I have seen many website owners struggle with getting their websites running over HTTPS after installing SSL, and there have always been regular questions on this topic in the WordPress groups and forums. The suggested solutions being offered are often kludges which can cause other problems further down the line, which have dramatically increased since browsers have started to report non-encrypted websites as “not secure”
Google’s Chrome Browser is now listing all unencrypted sites as explicitly “not secure,” beginning with July’s release of Chrome 68. The change applies equally to all HTTP sites, which will now display a “Not Secure” image in the address bar. HTTPS-enabled sites are unaffected by the change.
First announced in February, Chrome’s design shift is the latest move in a multipronged push by Google for more encryption on the web. Login sites have displayed similar “not secure” warnings since 2016, with gradually escalating alarms for expired certificates. Google has also subtly boosted HTTPS-enabled sites in search rankings since 2014, a significant incentive for webmasters to adopt the protection.
In a blog post announcing the change, Google described it as “a milestone for Chrome security.”
Using CloudFlare
If you are currently using CloudFlare, then you can handle the SSL requirements from here.
Note that using CloudFlare may also stop you from generating and renewing SSL certificates form your hosting control panel, particularly the free letsEncrypt cert.
Go into the CRYPTO section, and be sure to click on the HELP links which explain more about each setting.
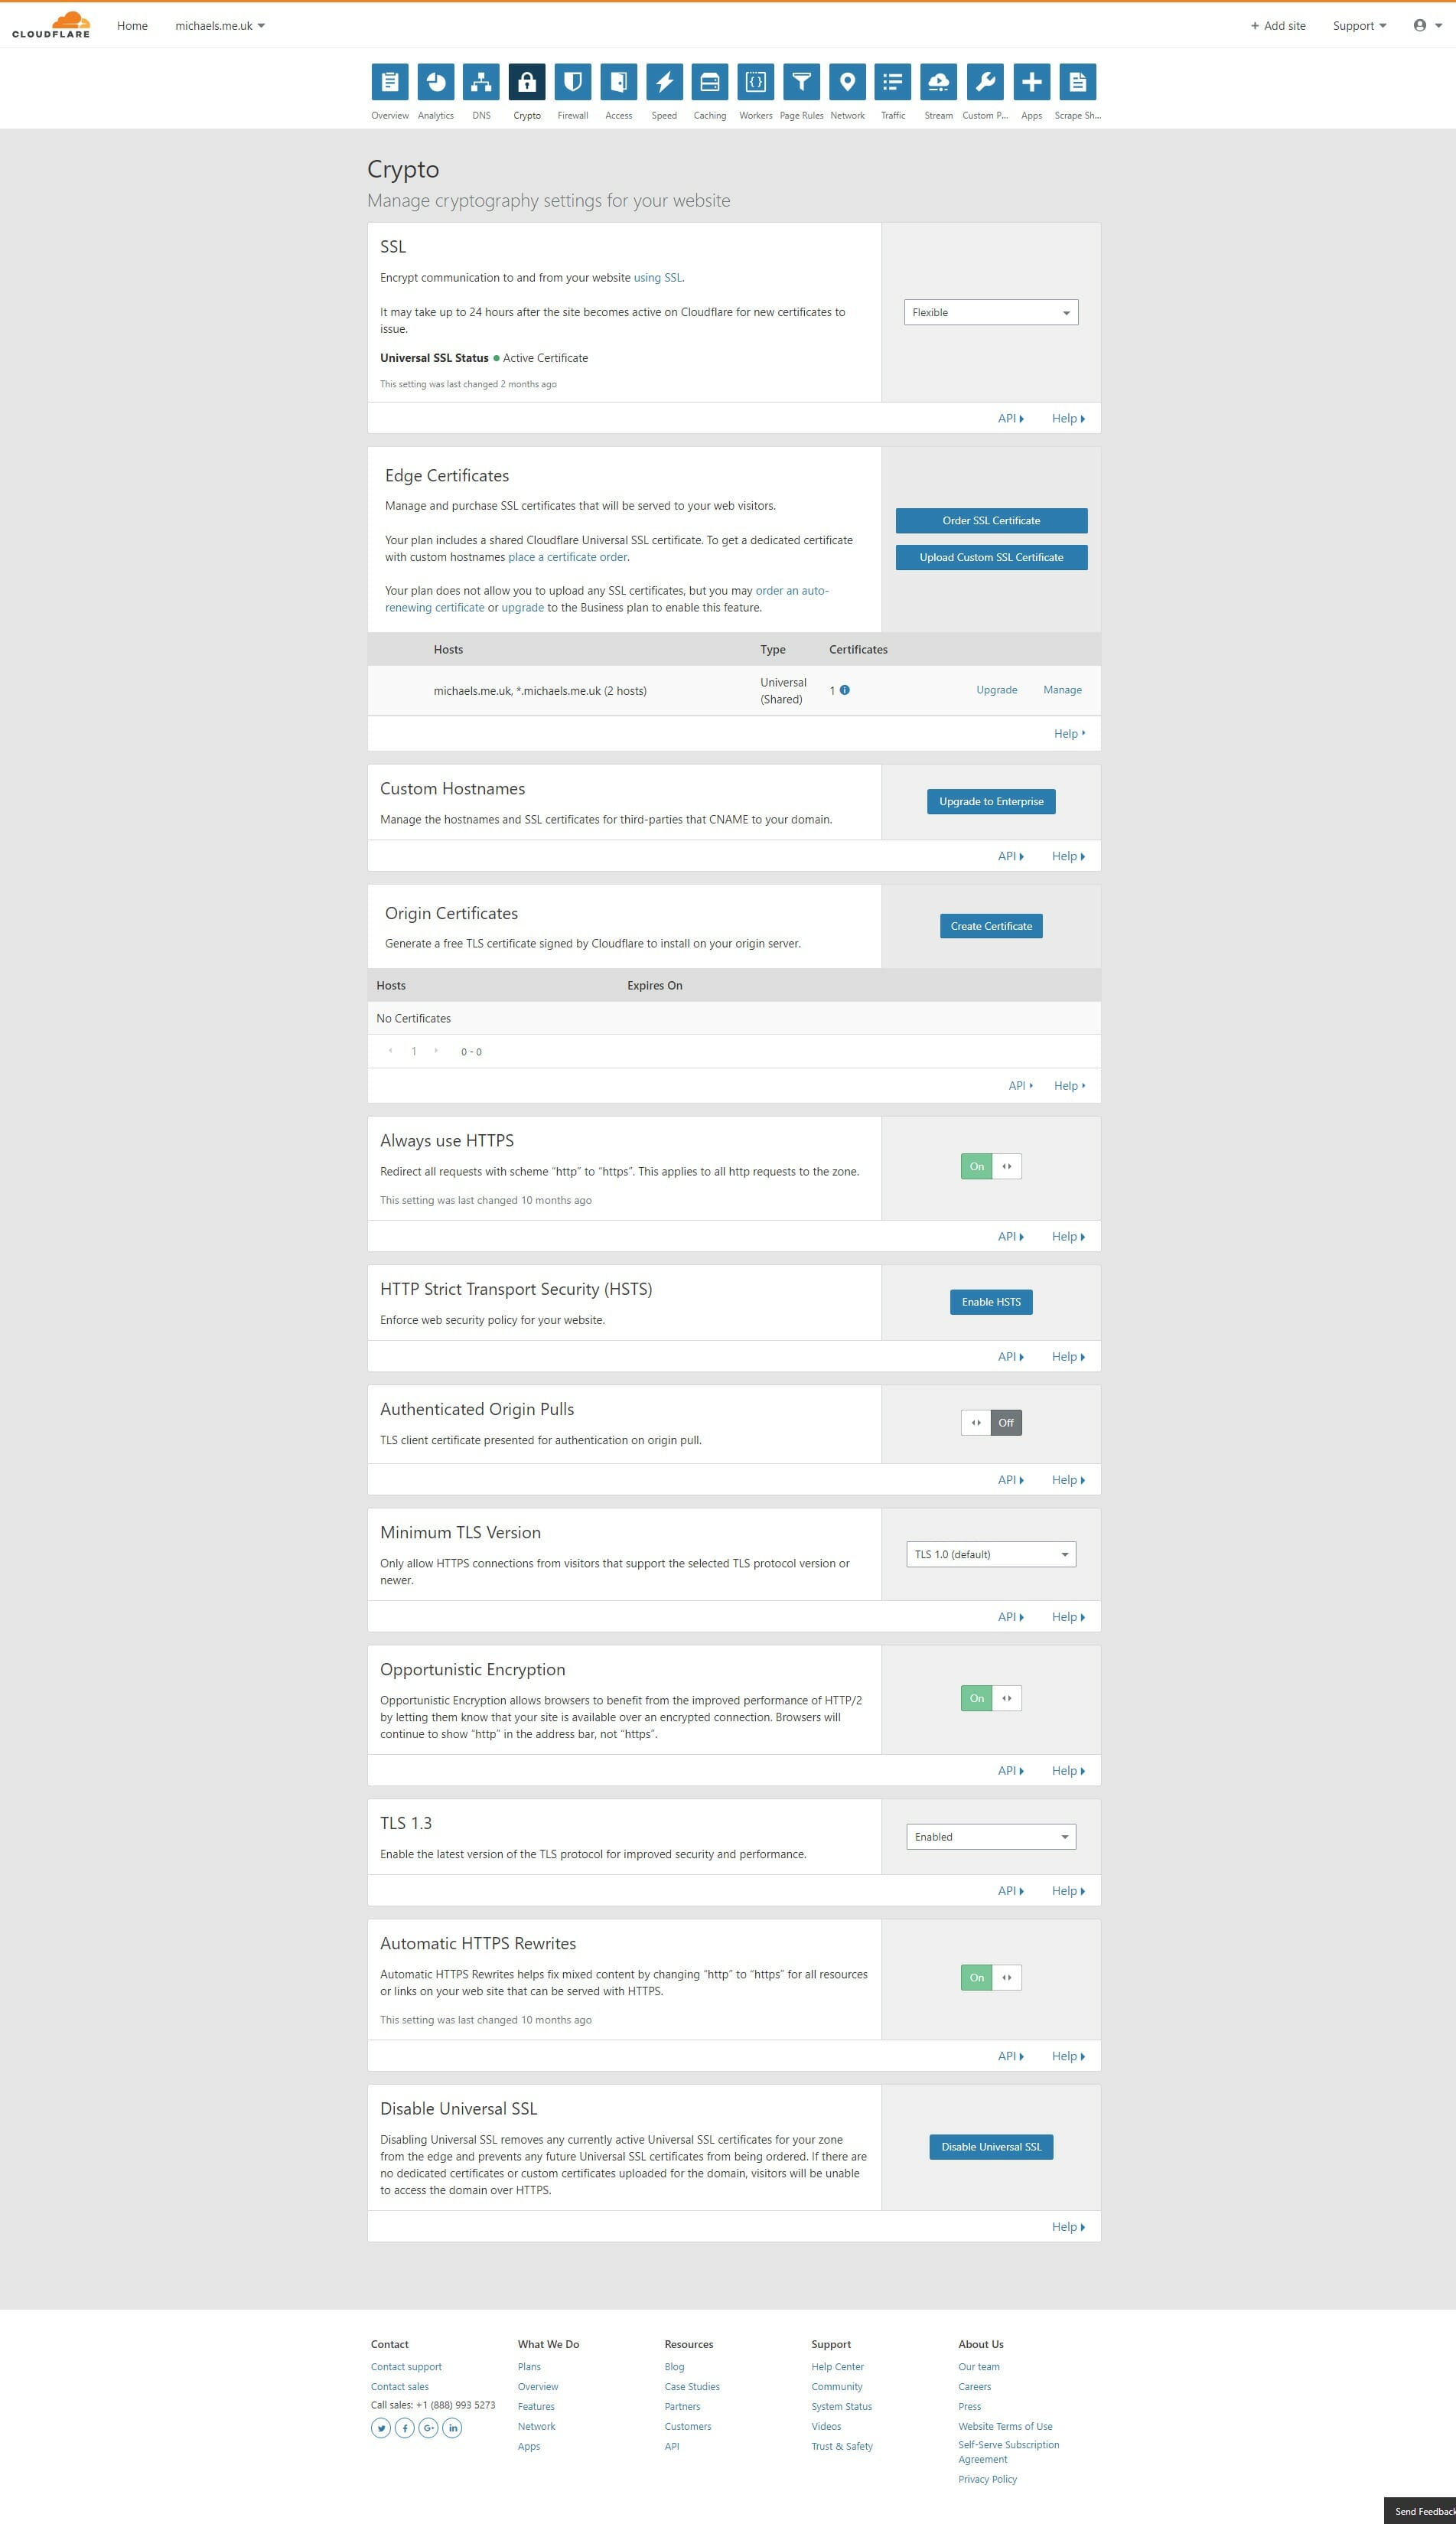
SSL
If your only reason for using SSL is to get rid of the “not secure” message in the browser, then use the Flexible SSL option. This simply encrypts the connection between the visitor and Cloudflare. But the proxied connection between Cloudflare and your website will still be over HTTP.
If you run an e-commerce store or run any kind of site where you collect sensitive client data and need to be PCI compliant, then you should probably use the FULL SSL option so that data is encrypted between Cloudflare and your site as well.
ORIGIN CERTIFICATES
If you need to use the FULL SSL option as mentioned above, then you can generate an origin certificate from here, and then upload it to your website via your hosting control panel.
Note that your visitors will never see this certificate unless you disable Cloudflare or enable bypass mode.
Always use HTTPS
Enable this if you do not want your site to be accessible via HTTP.
If you have sections of your site which need to be reachable via http for some reason
Automatic HTTPS Rewrites
Often there are links to external resources which are using http, this will caused a mixed content error and result in the “not secure” message. Enable this to fix that issue.
Search & Replace
A common solution that a lot of people use is a plugin called “Really Simple SSL”. What this actually does is create rewrite rules to redirect all http requests to https.
While this will get the job done, it is rather like permanently redirecting your mail after you move house rather than contacting your bank, cable company etc and giving them your new address.
The proper way to it is to replace all http URL’s in the database with https. The reason you need to do this is because all the media files are loaded by the visitor’s browser, So if all these requests get redirected. If you count up all the css files, javascript files and images on a page then it can amount to a noticeable increase in the loading time of the website.
This can be done with the better search and replace plugin.
Once installed, you just tell it what to search and replace, and what tables to run against, which will primarily be the “posts” tables.
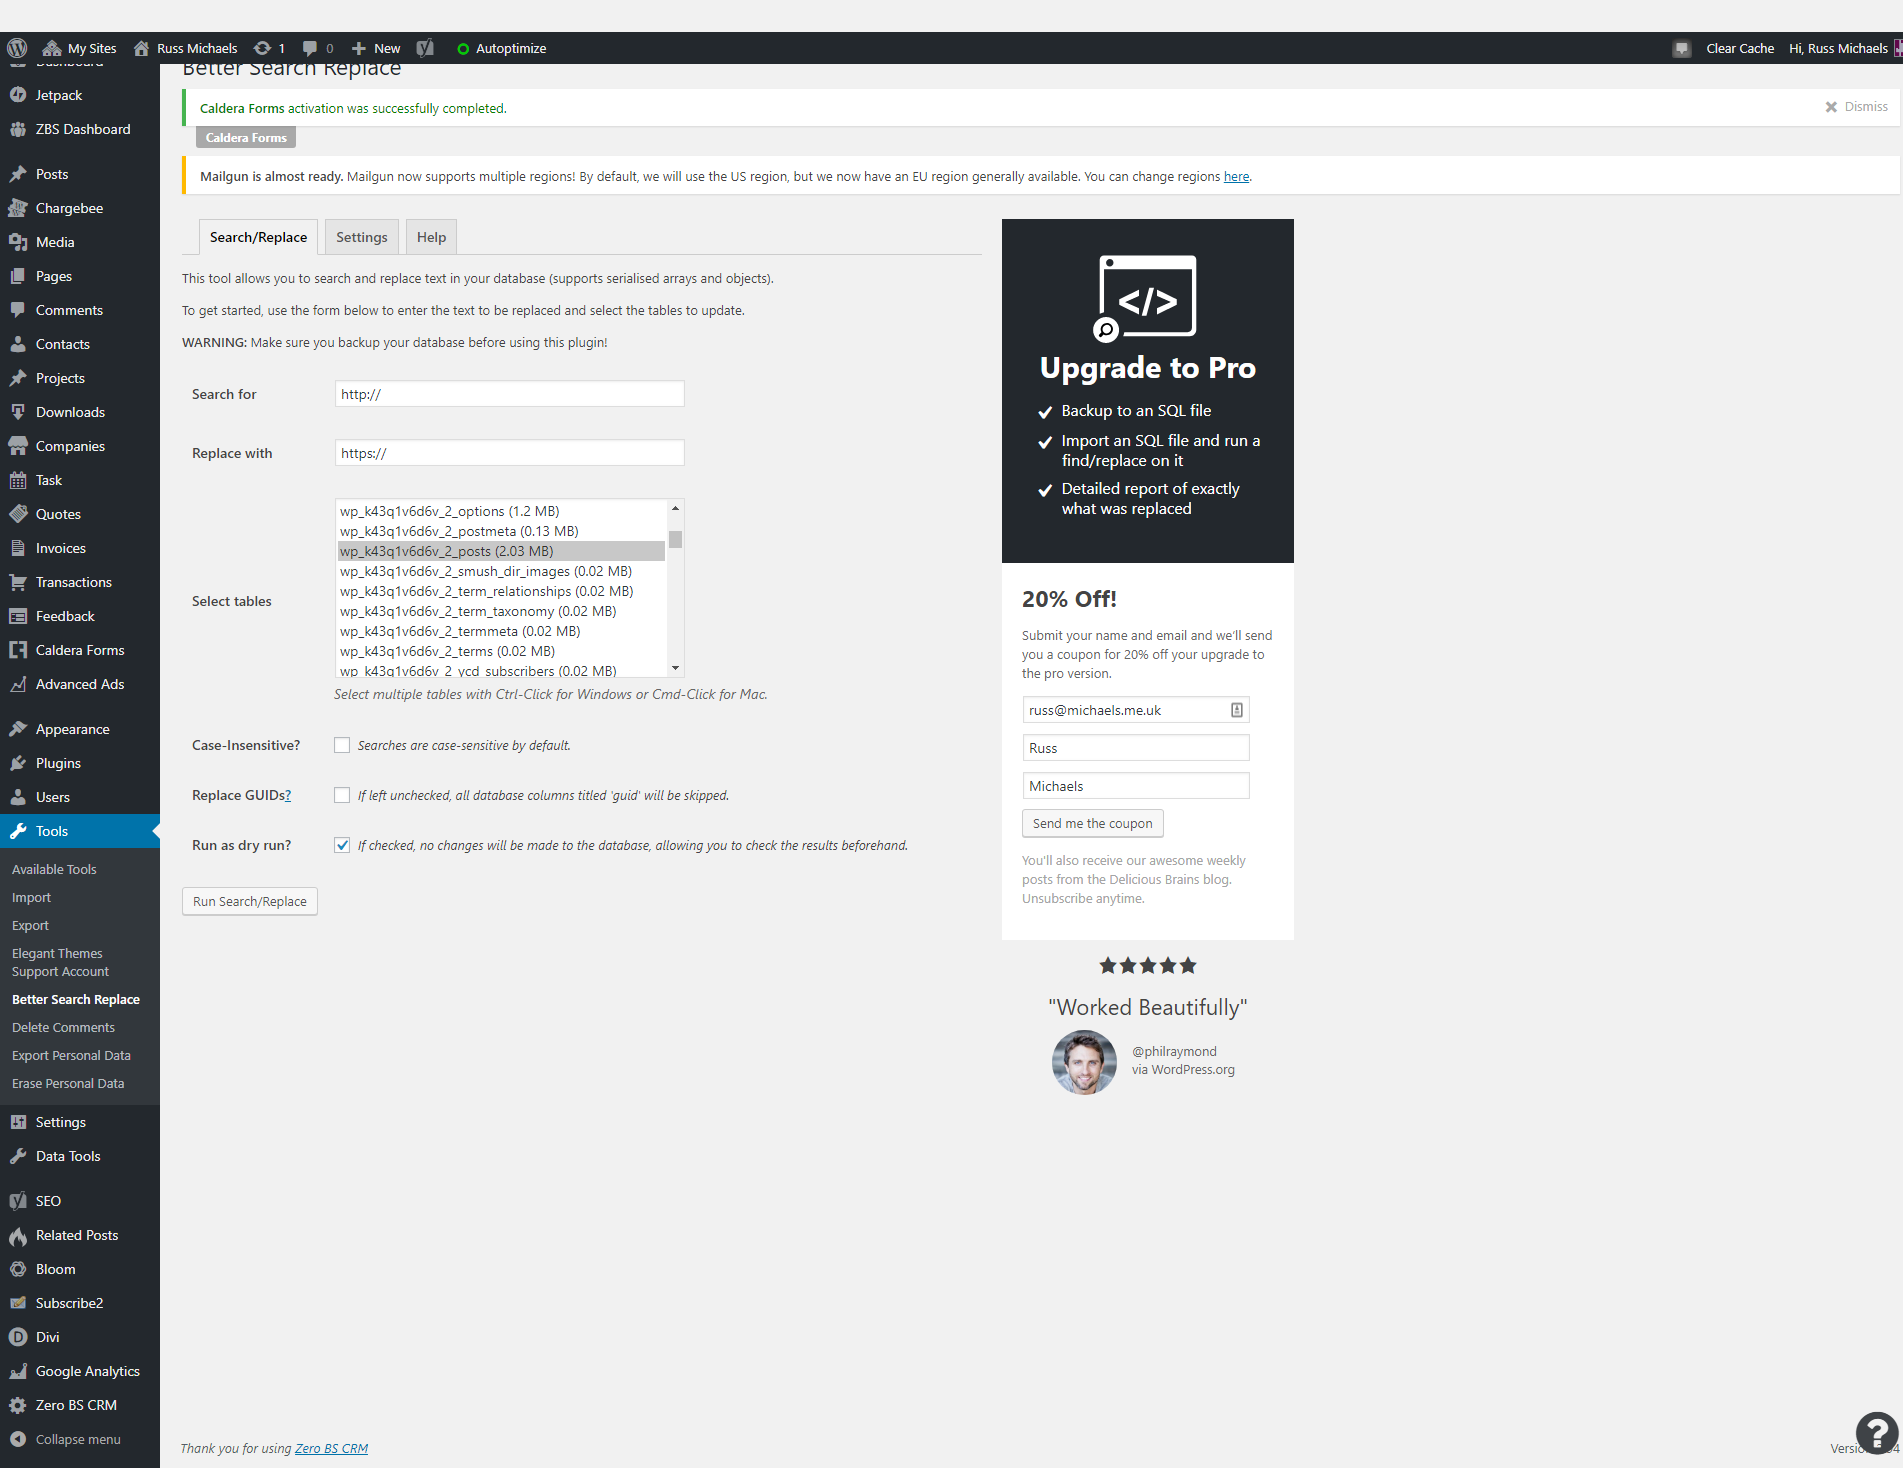
Once this is done, you should no longer have any mixed content issues.
Change Site URL
If you have SSL installed on your site, you need to update your websites default URL to HTTPS under the general settings.
Only do this if you actually have an SSL installed on the site through your hosting control panel.
If you are using Cloudflare flexible SSL, then it will be connecting to your site over HTTP, so DO NOT make this change.
If you are using Cloudflare FULL SSL, then DO make this change.

Finally, if you still have any issues, make sure that you clear any caching plugins you have in place, as well as your browser cache.


Recent Comments